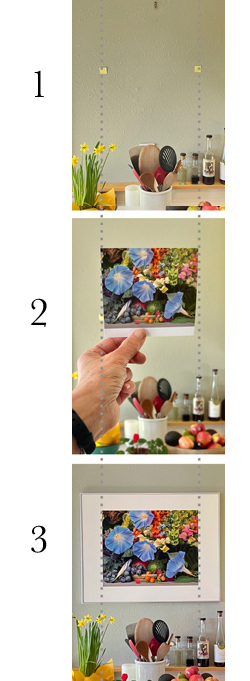
How to pre-visualize photo placement on your walls.
In Photo #1, we've placed two Post-it Notes, with the outside edges spanning the widest dimension of the displayed area of the photo. That refers to the part of the photo that is displayed through the window mat).
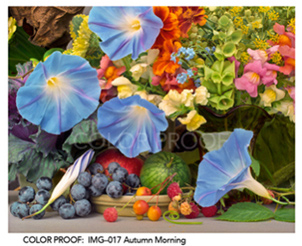
In this example, which uses my 28" x 22" framed composition, Autumn Morning, IMG-017, the displayed portion measures approximately: 19 1/2" Wide x 15 3/8" Tall.
The dotted vertical lines show the alignment between each of the photos displayed here. As you can see, in Photo #3, the actual displayed image fits within these lines.
In Photo #2, we're holding the Print Sample about six feet away from the wall that we're considering. Since the Print Sample is scaled down proportionally (it has the same aspect ratio W x H as the final actual size), all we need to do in order to visualize it on the wall is to adjust it forward and backward until its widest edges just cover up the two Post-it Notes. This step requires closing one eye and a bit of imagination, but it does give you a close ballpark estimate of how it fits the wall.
Photo #3 shows the placed print.
Just a last note: When viewing my photos online, I have approximated the visual area that shows through the matted window. If you purchase my new Archival Poster/Prints (P-28, P-22), you will receive the entire printed photograph, which would then be fitted underneath a window cutout. To assist the frameshop, I include a double printed window reference print, or what I refer to as my "window crop." There's one for you and one for the frameshop, along with measurements to match my window size and placement in the Framer's Window Crop Reference Guide.
If you would like to learn more about windows and frame sizing, please refer to my Order Information section.